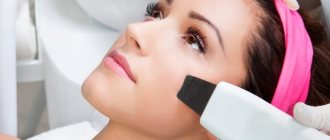
It is hardly possible to create a perfect manicure on uneven nails. A smooth finish is an integral part of beautiful, well-groomed nails.
Sometimes even high-quality products do not give the effect of a smooth surface, and all because of the structure of the nails. For some young ladies, the surface of the nails may flake or have a naturally wavy surface.
In this case, you simply cannot do without alignment. Do you want to know how to straighten the nail plate?
There is nothing complicated here, and for this procedure it is not at all necessary to visit a nail salon. If certain materials are available, leveling can be done at home.
What it is?
Everyone's nails have their own individual texture. Those girls whose hair is naturally smooth and without flaws do not experience problems. But some people have nails with an uneven surface, extremely brittle and sensitive. And during the manicure procedure, nails are subjected to additional tests in the form of filings, grinding, and hardware, which creates additional stress on the nails. You need to straighten your nails so that their correct architecture is formed. In addition, this will prevent such troubles as varnish running, uneven coating, and coloring of the cuticle area.
Alignment takes place in the following two stages:
- the first layer is a primer, designed to mask nail defects;
- the second is the finishing one, thanks to the even spreading of the base, the nail takes on a natural, even shape, fading away in the area of cuticle growth; the result is a perfectly smooth nail surface ready for decoration.
Leveling the surface of the nail is an important stage of manicure. It has advantages such as:
- the ability to further strengthen nails and extend the life of the decorative coating;
- creating a geometrically correct surface of the nail, which will give the correct direction of its growth;
- simplicity of the procedure - it takes no more than 15 minutes, and no additional funds are required to carry it out; it is important to carry out the leveling procedure if the previous manicure is removed with a device, since it is necessary to leave the base layer intact in order to further protect the nail from external influences;
- aesthetics - a smooth nail plate will make the glossy highlights of the nails ideal after applying the decorative coating.
As already noted, there is no need to purchase special products for this stage of manicure. The equalizer can be the products that every nail artist has, namely:
- leveling base for gel polishes;
- strengthening biogel;
- gels for nail extensions;
- acrylic Powder.
Important! The general principle for choosing a leveling layer is density and density. Liquid bases for gel polishes or self-leveling gels will not work as they will simply run off the nail and create additional problems.
Nail prosthetics reviews
“I developed a fungus on the nail of my big toe and only remembered that everything was not fine with me before the onset of summer. The Lips clinic advised me to have nail prosthetics done. I liked everything, the nail turned out beautiful, just like a real one. I went on vacation; neither the sea, nor the sun, nor the sand had any effect on his condition. I think this is a very good and necessary procedure. Thank you for your help!”
Irina, 32 years old.
“After the injury, the nail didn’t want to grow! I thought I would have to wear closed shoes for the rest of my life! She had a terrible complex! Quite by accident I ended up at the Lips clinic and here the podologist offered to do nail prosthetics. In just 40 minutes I had a beautiful new nail done. At first I was afraid of hurting him, I thought that he would break soon. But three months have already passed, and now a new, regular-shaped nail has grown in place of the prosthesis. Thanks to my podiatrist for a good job!”
Nastya, 25 years old.
Still have questions about nail prosthetics?
Call, or better yet, come to our clinic - consultation with a podiatrist is free.
Sign up now by phone. or leave a request.
How to choose?
The easiest way to straighten the nail plate is to use gel polish. This method can be done even by a beginner. First of all, you should pay attention to the bottle with the base - it should have the label “with rubber” written on it. Rubber makes the composition more viscous, thick and flexible. It is thanks to this rubber consistency that the depressions are filled and the tubercles on the nail are leveled, and an arch of the correct shape is formed. The advantages of this method are as follows:
- base with a rubber base is usually self-leveling;
- eliminates natural nail defects;
- application speed.
There is an option for straightening the nail using biogel. Its advantage is that it not only smoothes the nail, but also heals it thanks to the vitamin and mineral complexes in its composition, proteins and resins. Biogel has the following advantages:
- natural composition;
- healing effect;
- acceleration of nail growth;
- ease of removal of the coating.
However, it is worth noting that working with biogel is difficult. The brush should not touch the working surface of the nail - alignment should occur from the tension of the composition. When choosing biogel in a store, carefully consider the brush - it should be soft and have long bristles.
The third option is leveling the nail plate with gel. Here it is worth remembering that the gel cannot be removed with a solvent - it can only be cut off with a manicure machine or an abrasive file. The composition of the gel is relatively non-toxic and safe. It covers and strengthens the nail well, providing an even decorative coating and its resistance to external factors.
Finally, you can use acrylic powder for leveling. Everyone knows that acrylic is used for nail extensions. However, this material is very versatile. It is more difficult to work with than the above-mentioned levelers, but in the end you will definitely be satisfied with the result. Acrylic powder perfectly strengthens nails, serves as a strong base for broken nail corners, and allows the coating to be durable for a long time. The choice of method and material for leveling the nail plate is yours, but remember that you should not be too complex because of small natural defects of the nails.
Base for gel polishes
Leveling the nail plate with gel polish is an event accessible to everyone. Even an amateur can cope with this. The main thing is to purchase the necessary materials for this and a special lamp for their polymerization.
Pay attention to choosing a suitable base coat for the varnish. Leveling the nail plate with a rubber base is considered the most effective.
The rubber in the base provides a richer and more viscous coating. This base is plastic and does not spread. The rubber base is very specific in its consistency. It does a good job of eliminating imperfections on the nail plate.
Will help to form the correct arch. There are quite a few branded base coatings on sale that have earned a lot of positive reviews.
How to use?
It is clear that the leveling layer on the nail is not at all the basis of the manicure. Before applying it, the pens go through a series of procedures - filing the nail, removing the cuticle, sanding, applying the main primer and only then the base coat. Self-leveling occurs in several stages.
If this is a base for gel polish, then they are as follows:
- first, apply a thin layer of base on the nail and dry it for several minutes in a special lamp;
- then use a brush to leave a large drop of base in the center of the nail, and then move it to its top point, simultaneously modeling the roundness and C-shaped bend;
- do not press the brush too hard; model the bend using the very tip of the brush;
- for a final check and a perfectly even layer, turn the nail over with the coating facing down - gravity itself will correct micro-errors;
- do not forget about the end side of the nail - process it last.
When leveling a nail with biogel, the scheme is essentially the same:
- first prime the nail with a thin layer and dry it in a lamp;
- then spread a large drop of gel evenly over the nail, starting from the top point and moving to the tip; make sure that the bend of the nail is formed correctly - there should be less biogel on the sides of the rollers;
- be sure to flip your finger over for gravity alignment at the end.
When using acrylic-based powder as a leveling layer, there are some operating features, such as:
- first, apply a thin layer of base onto the filed and shaped nail and dry it;
- then, as described above, spread a large drop of base and sprinkle powder on it;
- after drying the nail in the lamp, remove excess powder with a brush or brush; unevenness can be removed with a file;
- At the end, cover the acrylic coating with a finishing base layer;
- Then you can apply a decorative coating with the selected design and top coat.
As you can see, it is not so difficult to carry out the procedure for leveling the nail plate. Even beginners can do this at home if they have the necessary materials and a lamp.
Advantages of the nail plate correction method
At the preparation stage, the doctor tells you how much nail correction costs, how the procedure is carried out, and what is required during the rehabilitation period. Preliminary diagnosis is very important, allowing the doctor to assess the extent of damage to the nail and determine the cause of the deformation.
The procedure is non-invasive and does not cause pain or discomfort. In most cases, shape correction is carried out over several months until the nail plate changes the direction of growth and becomes fixed in a new position.
During the rehabilitation period, the patient must follow the specialist’s recommendations to limit the load on the finger.
Adviсe
In general, if your nails are naturally uneven and lumpy, then it’s worth trying to find the root cause of such problems. The main sources of defects can be the following:
- immunological diseases;
- hormonal disorders;
- skin diseases such as psoriasis and lichen planus;
- weakened immunity, general fatigue of the body;
- nail fungus;
- injuries.
Important! If your nails suddenly become painful, brittle and thin, it is better to consult a specialist who will understand the problem and prescribe adequate treatment.
You can try to correct the situation using popular advice. One of these techniques is baths, which have a strengthening and general healing effect. An example would be an oil-based hand bath: mix a few tablespoons of olive, castor and vegetable oils and heat in a water bath. The marigolds should be kept in the composition for at least 20–25 minutes.
As for practical tips for leveling the nail plate using nail products, the recommendations are as follows:
- after alignment, inspect the nail from the side and the end: you should trace the correct arched bend with clear boundaries in the center of the nail;
- check the coating not only by eye, but also by light: the highlights on the nails should be even and clear, without any creases or refractions.
Tip on how to achieve the perfect highlight: a round lamp is essential here. The gloss of a nail primarily depends on the light source. When using a regular lamp, the glare can be of any shape (from square to corner). With a round lamp, it will become ideal and have a regular round shape. You can use a regular table lamp, but the main thing is the shape. It is enough to hold the nail under it for 15–20 seconds, and then place your fingers in the lamp to polymerize the coating.
In the race for well-groomed hands and stylish manicure, do not forget that first of all your nails need proper care. You should not rely only on the miracles of the nail industry and the professionalism of the master. It is extremely important to eat properly and variedly, carry out cosmetic medical procedures for nails (baths, masks, massage), and protect your hands from aggressive environmental factors. Only then will your fingers shine with beauty and health to the very tips.
To learn how to level the nail plate for gel polish, see the following video.
With good care and no health problems, the nail plate has a smooth, attractive surface. But sometimes the external condition of the nail deteriorates; in such cases, a straightening procedure is indicated.
When is it necessary to straighten the nail plate?
There are several situations when it is necessary to perform the alignment procedure:
- if there are defects in the nail after the previous manicure: strong cuts, improper formation of the shape;
- if the nail is thin after wearing shellac for a long time or for natural reasons;
- in the presence of natural irregularities and differences on the nail plate;
- if there is fragility and delamination of the plate, this is especially important if the nails suffer during professional activities and at home;
- after suffering nail diseases that provoke deformation of the plate;
- strengthening contributes to longer wearing of the colored coating that can be applied on top;
- the strengthening layer makes it possible, when correcting and removing the top coating, not to remove the material all the way to the nail;
- if you want to grow a longer length, the reinforcing material protects the plate, which grows to the desired length along with it.
Tools and materials you will need
It is necessary to level the nail plate using the correct technique and using the necessary tools.
| Tools | How are they used? | Peculiarities |
| Wooden sticks made from orange wood. | They can be used to push back cuticles and clean the inner surface of the nail. They differ in size and shape, sometimes they have an abrasive coating similar to the coating on files. | The sticks are disposable because they absorb liquids well and cannot be disinfected. |
| Pusher or cosmetic spatulas are metal products that look like a spatula, one end is shaped like a spatula, the other end is pointed. | Used to lift and remove cuticles and remove impurities. Also suitable for creating nail shapes when doing extensions. | The metal from which pushers are made is intended for sterilization and disinfection. Therefore, the product can be used repeatedly. |
| Files and buffs have a variety of shapes and are made from various materials. They have a coating of varying degrees of abrasiveness - small or large particles. | Files are necessary to create the shape of the nail and align the cuts. Buffs are used to polish the nail itself or an already applied hardened coating. | Metal products are subject to sterilization. In other cases, disinfectants are used. |
| Brushes with bristles of various lengths and different hardness. | Necessary for removing dust and particles of materials after sawing. Brushes are also needed for cleaning instruments and attachments of the device. | Brushes can be successfully disinfected. |
| The manicure machine includes a large number of attachments. | With the help of mechanical processing the device can solve the following problems: |
- making cuts and creating shapes;
- removing cuticles, sanding the skin around the cuticle;
- removal of dust, particles of materials and skin residues;
- polishing the surface of the nail and its cut.
How is nail prosthetics done at LIPSCLINIC?
Stage 1 - preparation
If your nail plate has been completely or partially removed, then preparation is limited to disinfecting the nail bed. In other cases, the podologist first removes the diseased areas of the nail: using metal cutters and diamond stones, he removes brittle, loose and discolored parts of the nail. For the prosthesis, the podiatrist leaves areas of hard nails only 2-3 mm long.
If you have an ingrown nail, then at the initial stage the podiatrist will cut out the ingrown areas of the nail and carefully treat the nail folds. Subsequently, the rest of the nail and the skin around it are treated with a special cleanser “GEHWOL Nail Repair Cleaner”.
Stage 2 - applying prosthetic gel
At LIPSCLINIC we use gel "GEHWOL Nail Repair". The gel is applied in a thin layer, so you will not feel pain or discomfort. Within a few minutes, the podiatrist will carefully spread the gel with a brush over the surface of the nail bed and form the shape of the nail.
Stage 3 - stabilization of the gel with ultraviolet radiation
Within two minutes the gel hardens under the influence of ultraviolet light. Our podiatrists apply GEHWOL gel in two or three layers. After each application, the gel is exposed to ultraviolet light. Such gradual nail prosthetics makes it possible to ensure that the artificial nail has a high degree of elasticity. Finally, the podologist applies an opal-colored gel to the free edge of the nail to give the nail the most natural look.
Stage 4 - shaping
At this stage, the podiatrist treats the surface of the nail with special tools. This is necessary in order to give your nails a beautiful look and the correct shape.
Nail prosthetics: before and after
ON-LINE RECORD ORDER A CALL
Leveling the nail plate with a base
Leveling the nail plate using a gel polish base is the easiest option to achieve the desired result. An important nuance for successful strengthening is the quality and consistency of the base. When purchasing material, you must ensure that the packaging indicates the presence of rubber. This guarantees the thickness and viscosity of the base.
It is due to the consistency that you can achieve a good shape and hide the unevenness and imperfections of the nail plate as effectively as possible.
What bases are suitable?
Here are the brands of bases that are well suited for the leveling procedure:
Leveling and strengthening technique
The alignment procedure is carried out in accordance with the main steps. Compliance with them allows you to achieve the desired smoothness and strength of the nail plate.
The diagram shows how to properly align the nail plate.
Here are the necessary steps:
- The very first and most important stage is nail preparation. It is necessary to remove the cuticle so that it does not interfere with the application of the material. Depending on the situation, it can be removed or simply moved to the edges of the plate.
- Next, you should give the nail the desired final shape by processing the free edge. Sand with a coarse-grain buff for better adhesion of the material to the nail.
- Wipe the nail with a degreasing agent. Then apply primer.
- It is worth choosing a brush that best suits the size of your nail. Use a brush to take a small amount of gel and place it on the apex zone - the line at the root of the nail, located a small distance from the root itself.
- Next, the drop of material should be stretched in one direction towards the root and in the other direction towards the free edge. It is worth remembering that the gel does not harden when exposed to air, unlike regular nail polish, so blemishes and gaps can be easily corrected with repeated movements of the brush. In this case, the pressure should be moderate in strength so that deep furrows do not form.
- After processing the entire plate, you need to seal the free edge of the nail.
- Place your nails in the lamp space and wait the required amount of time, depending on the properties of the lamp.
- When finished, remove the sticky layer from the surface if the base suggests the presence of this layer.
Advice from the experts
When using a gel base, there are several secrets that will help you create the perfect coating:
- after applying the layer, you can turn the brush over with your palm facing up, so the base forms an effective shape;
- some experts recommend applying and drying nails one at a time so that the base does not have time to spread and penetrate into the folds between the skin and the nail;
- For more efficient hardening of the material, it is recommended to use an LED lamp, as it has a faster drying time.
Leveling the nail plate with biogel
Biogel is a material that combines 2 important properties:
- biological basis, which has a healing effect on damaged nails thanks to the vitamins A and E contained in the composition, teak resin and proteins;
- the gel base, which contains restorative substances, forms a strong protection for the plate and masks imperfections.
Biogel helps to activate the protective properties of the nail and the production of keratin.
Which biogels are suitable
When using biogel, you should opt for the following brands:
- Bio Stretch Gel (BSG);
- Yoko;
- Atica TM;
- Creator;
- El Corazon.
Leveling and strengthening technique
The application of biogel does not differ significantly from the application of a gel base:
- Prepare the plate - remove or push back the cutiticle.
- Using files, give the desired shape and make the surface of the nail rough.
- Degrease nails and apply primer.
- Apply a thin layer of biogel over the entire area of the nail, slowly stretching a drop of material to the root and then to the free end of the nail. Dry in a lamp.
- Since biogel has a less dense texture after polymerization, it is worth repeating the application to get 2 to 4 layers of gel in total. Each time it is worth lengthening the drying time from 10 to 15 seconds.
Features for C-curve nails
The C-curve is the formation of the highest point of the nail, which is located closer to the free edge of the plate. To do this, applying the material begins by placing a drop at a slight distance from the root, followed by stretching it to the sides.
Then, to create a bend, you need to place your hand with your fingers down so that the material flows a little into the desired area. After a few seconds, place your hand in the lamp and dry the coating.
Advice from the experts
For greater durability of the coating, it is worth applying a base under the biogel.
Cases when it is necessary to straighten nails
- When the surface of the nail is thin and wavy. It is unlikely that with such a structure of the nail plate it will be possible to grow long nails.
- For weakened nails, straightening will work just as well as strengthening.
- Before applying flexible gel polishes that are prone to damage.
- For nails growing upwards.
- Before applying acrylic materials to the nail.
- When you are going to glue sliders on your nails. The pattern fits more tightly on a flat surface, which will extend its wearing time.
So, let's study in more detail what materials can be used to level the surface of the nail.
Leveling the nail plate with manicure gel
Manicure gel allows you to form especially strong nails with the most even surface. This is especially important in the presence of severe damage and grooves.
What gels are suitable
The following brands of gels have the optimal consistency for strengthening:
Leveling and strengthening technique
The method of applying this material is universal:
- Preparing nails, creating a shape, processing the cuticle, creating a rough surface.
- Before applying the primer, you need to degrease the plate.
- Apply a light layer of gel from a drop on both sides and dry the coating. Then repeat the application, creating from 1 to 3 layers is acceptable.
Advice from the experts
There are several secrets to using manicure gel:
- if the gel forms unevenness on the free side of the nail, they can be corrected using files; this can be done on any layer of the gel;
- to form a pronounced highlight on the coating, after applying the material, you should place your nails under a round-shaped lamp, even a table lamp will do, after 15-20 seconds you can place your fingers in the lamp to fix it.
Biogel leveling technique
- Treat the nail plate as standard.
- Degrease your nails with an acid-free primer.
- After the primer has dried, thinly spread the biogel.
- Dry the coating in a lamp.
- Repeat the procedure up to 5 times, increasing the polymerization time.
- Finally, coat your nails with top coat.
- Then you can decorate your nails as you wish.
Leveling the nail plate with acrylic powder
You can also level the nail plate using acrylic powder. It is a polymer powder that, after hardening, acquires a porous structure, which allows nails to breathe freely.
The coating also makes the nails strong and prevents peeling. Using powder requires a certain skill and knowledge, so it is not suitable for independent use by beginners at home.
What bases are suitable?
The most popular and high-quality powders are products of the following brands:
- Kodi Professional Power Clear;
- Irisk Professional Clear;
- TNL Professional Premium;
- InGarden Pure Glass;
- INM OTD Powder Natural;
- RuNail.
Leveling and strengthening technique
When using acrylic powder as a strengthening material, there are some differences compared to other classic means:
- Nail preparation is classic - push back or remove the cuticle, give the nail the desired shape, make the surface of the plate rough.
- Degrease the nail.
- Apply primer and wait until it dries completely.
- Take a small amount of base with a brush and spread it over the entire length of the nail; this layer does not need to be dried.
- Next, you need to place your fingers over the container with the powder so that the remains fall back.
- Carefully pour a small amount of powder onto the freshly applied base and dry the layer in a lamp.
- Then you should remove excess powder from the skin using a special brush.
- If necessary, apply another layer of powder.
- Depending on the instructions for using the powder, it is permissible to apply a top fixing layer.
Advice from the experts
When using powder, there are several secrets that will help make this type of manicure even more comfortable:
- to achieve maximum results, you need to purchase products from one manufacturer;
- some masters prefer not to sprinkle powder on top, but to immerse the nail with the applied base completely in a jar of powder;
- To remove the powder coating, you can use liquids to dissolve acrylic materials or cut off the coating using a device.
Leveling technique with a gel polish base
- First, prepare the nail plate for the leveling procedure - remove the cuticle, give the nails the desired length and shape.
- Using a brush, pick up a drop of base coat and place it at the apex area.
- Using smooth movements, stretch the base towards the cuticle.
- Use the corner of the brush to give the nail an architectural shape.
- Turn your fingers over with your nails facing down and seal along the free edge.
- Dry your nails in a lamp.
- Then you can use any gel polish to smooth the nail plate.
Post-procedure care
You can get maximum benefit for your nails by following several recommendations after straightening:
- It is recommended not to wet your hands for 2 hours after strengthening.
- During the first 24 hours after strengthening, it is necessary to protect your nails from strong mechanical and chemical influences.
- In cold weather, it is necessary to actively moisturize the skin of your hands and around your nails, especially before going outside.
- Before going to bed, it is recommended to massage the skin around the nails with a special cuticle oil.
- If possible, remove coatings that harden in the lamp using a machine, rather than by dissolving and manual cutting.
- After wearing gel and acrylic coating for a long time, you should give your nails a rest and recovery.
Following simple rules after the straightening procedure allows you to maintain an excellent appearance and improve the health of the nail plate.
What is it for
Each of us has a different nail structure. Lucky are those girls whose hair is perfectly even and smooth. But some young ladies have a hypersensitive plate (irregularities, detachments, tubercles). In addition to everything, during manicure, nails are often subjected to various treatments: filing, polishing, removing gel polish with a machine, etc., which also has a bad effect on the condition of the nails.
Alignment and strengthening are necessary in order to give the nail the correct architecture. It will also get rid of varnish runs, waves at the end, various bumps and dents. The first layer is a primer, it hides all the irregularities. The second layer is evenly distributed over the nail, smoothly disappearing in the area of the side ridges and cuticle, forming an ideal surface.
This procedure is simply necessary and has a number of advantages:
- Leveling strengthens the nails, and the coating lasts for several weeks before correction.
- The ability to create the correct nail architecture. When adjusted, the nail will grow in the right direction.
- Simplicity and accessibility. In order to make strengthening, you do not need to buy additional products. A simple procedure takes about 10 minutes.
- It is important to do leveling when removing the coating with a device, so that when cutting, a base layer remains. A thin layer of the product will cover and protect the nail from mechanical stress.
- Static and beautiful. The smooth surface gives beautiful and even highlights from different light sources.
Benefits of leveling with a gel base
- rubber-based bases are self-leveling, so this is the best option for beginners;
- gel polish applied on top will complement the leveling effect: visually fill cracks and remove defects;
- the whole procedure takes very little time;
- this method is simple and accessible, suitable for independent use;
- the durability of such a manicure has been confirmed in practice - it does not chip or fade;
- The rubber base extends the wear time of even the cheapest gel polishes.
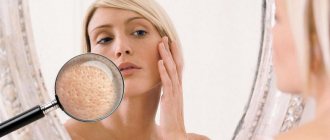
Why do irregularities appear?
Ribbed, wavy and thin nails are always a problem. With such nails, any manicure does not look very neat. Most often we do not think about the true cause of our deplorable condition.
It is worth paying special attention to this issue, because nails are an indicator of our health. For example, if your nails are covered with a groove near the cuticle, then you should take a course of vitamins to saturate your body with useful microelements. Ribbed plates appear as a result of microtraumas, and also cause fungus, psoriasis or other problems in the body.
Advantages of treatment at the Podology Clinic
If you have problems with your nails, contact the specialists of the Podology Clinic. Here you can undergo a full examination to identify their cause. Based on its results, an individual treatment regimen will be developed.
The main advantages of our nail plate plastic surgery department in Moscow:
- modern equipment and tools made in Germany;
- effective drugs with a minimum content of synthetic components from leading pharmacological companies;
- the latest treatment methods;
- highly qualified doctors who annually undergo internships in the largest Russian and foreign podiatry centers.
Leveling the nail plate with a base
The base should be thick, it is advisable to choose a rubber one. The thicker it is, the easier it will be to strengthen the nail. More liquid products run faster to the side rollers. You need to keep an eye on this.
What bases are suitable:
- Kodi;
- Komilfo;
- Lovely Base;
- NeoNail;
- Adore Professional.
Strengthening technique:
- Prepare your nails for work.
- It’s good to scoop up a drop of the desired size with a brush and apply a thin layer of base.
- Place a drop in the apex area (almost near the cuticle). Pull it to the cuticle and stretch it in 3 movements. The first is in the center, the second is on the right edge, the third is on the left edge. Don't be afraid to ruin something. The base brush is very soft, it will not be able to push through the drop, so movements can be bold.
- Use the corner of the brush to form the architecture of the nail.
- Turn the nail over, seal the end and dry thoroughly.
Video instruction: Base leveling technique
Leveling the nail plate with biogel
The choice of most girls is biogel. It has a thick consistency and dissolves well. Many manufacturers produce special biogels for thin nails. This is a real salvation for problematic nails that suffer from detachments. You need to choose a soft brush with a rounded shape and long bristles. It should practically not touch the nail. The product should stretch only due to surface tension.
Which biogels are suitable:
- Bio Stretch Gel (BSG);
- Atica TM;
- Creator;
- Yoko;
- El Corazon.
Remember that to level with biogel, you also need to apply a base.
Strengthening technique:
- Apply a thin primer layer of basic biogel using a brush to prepared, fat-free and slightly buffed nails.
- Rub the base well, especially in the area of the side rollers, under the cuticle and seal the end.
- Dry the layer. In terms of time, the biogel dries like a regular gel polish: 30 seconds in an LED lamp and 2 minutes in a regular UV lamp.
- The second leveling layer must be applied to a well-dried primer layer. Saturate the brush with material gel and scoop a drop of a suitable size onto the tip.
- Place in the center of the nail about a millimeter from the cuticle.
- Push the brush forward a little towards the cuticle.
- When the drop lies along the cuticle, pull the material down to the tip. Without pressing, distribute the biogel over the nail, not reaching the end of the free edge, so as not to touch the dispersion layer and not violate its integrity. This will distribute the material more evenly.
- It is necessary to work on the side zones. You need to stretch the material from the droplet to the tip closer to the rollers.
- Turning the nail sideways, form a longitudinal line. Using the corner of the brush, lightly grab the layer of biogel and pull it down along the nail in long, even lines.
- Near the side rollers, the thickness of the gel should be minimal.
- The result will be a small volume along the center line of the nail from the cuticle to the tip with the highest point somewhere between the center and the cuticle at about 1/3.
- Turn the finger over and seal the end.
- Dry the layer in a lamp.
Before applying a colored layer, regardless of whether you need to cover your nails with colored gel polish or gel, you need to remove the sticky layer. This is necessary so that the color layer lays down well and evenly.
C-curve nail
It is necessary to ensure that the transverse bend has a beautiful rounded shape without excess materials on the sides. This is especially true when working with liquid materials. To avoid such an error and eliminate all irregularities, you need to turn your finger nail down.
Leveling the nail plate with manicure gel
An ideal option for those whose nails begin to curl unevenly as the length of the free edge grows. Using the gel, you can strengthen and correct the nail plate.
What gels are suitable:
- Cosmoprofi;
- Kodi;
- CNI;
- Irisk.
If you are leveling your nails with extension gel, it is important to remember that it does not dissolve. It just needs to be cut down.
Strengthening technique:
- Disinfect your hands and file the surface with a buff.
- Coat your feet with an acid-free primer for better adhesion.
- Using a flat brush, rub in a thin layer of gel base.
- Leave the layer to dry in a lamp for a few minutes.
- Use a brush to take a drop of manicure gel and place it in the middle of the nail.
- Push it closer to the cuticle, to the side ridges and carefully level it.
- If most often deformations occur on the free edge, then you need to pay attention to it and carefully level the gel there.
- Dry the layer in a lamp.
- Using a medium-hard file, carefully file all the irregularities of the nail: the side ridges, at the cuticle and the free edge. It is also necessary to trim the end.
Now your nails are perfectly smooth, and the color coating will lie on them flawlessly!
Life hack: how to make perfect highlights
After we have learned how to level the nail plate, we should learn one more secret. You won't get the perfect highlight without a round lamp. Its appearance directly depends on the light source. With a regular lamp it will be anything: square, angular or oblong. But a beautiful round glare can only be obtained from a round lamp. In its absence, forming it will be very problematic.
In order to get it, a regular round table lamp will do. After applying the strengthening, the nails can be held under a regular lamp for 20-30 seconds, and then sent to polymerize.
| All attachments can be cleaned and disinfected. | ||
| Degreasing liquid | Removes the sticky layer after drying the coating in the lamp. Also necessary for treating nails from fatty film. | The liquid is sold in large tubes and is an essential element of a long-lasting manicure. |
| Primer | Apply to the nail after degreasing, but before applying the base or base substance. A primer is necessary for maximum adhesion of the material and the nail. Does not require drying in a lamp, dries on its own almost instantly after application. | Sold in bottles with a brush, outwardly indistinguishable from any manicure coating. |
| UV or LED lamp | Used to harden the material. | When using the lamp, the bottom surface where the hands are placed may become dirty. Easy to clean with cleaning products approved by the instructions. |
Biogel for leveling the nail plate
Some masters believe that the most correct alignment of the nail plate should be done with biogel. In addition to the leveling effect, this material also has healing properties.
The biogel contains protein components, resins and vitamins that are useful for nails.
We recommend reading:
Cuticle removal - tips on choosing products and an overview of the best removal methods. 130 photos and videos of cuticle careHow to restore nails after gel polish - a review of the best means and methods of restoration at home (120 photos + video master class)
Magnet for a cat's eye: tips on how to apply iridescence simply and beautifully with your own hands (110 photos + video)
Natural and environmentally friendly material has special advantages:
- absence of chemical elements;
- therapeutic effects;
- stimulates nail growth;
- actively produces keratin, therefore it strengthens the nail plate very well;
- biogel provides long-lasting manicure;
- has a gentle effect on nails;
- the material can be easily removed.
The only disadvantage of coating with biogel is that the surface is not very durable, so it cannot create a decent barrier to repel attacks from ultraviolet radiation and chemicals.